Generating Power Automate Word templates to send by email or later use in record keeping is an easy, useful hack for association teams or anyone using these tools in the Microsoft ecosystem. Order receipts, membership cards, diplomas or certificates: whatever you need to produce and customize on a regular basis could be a good candidate for what I’ll show you in this step-by-step post.
While these types of documents are incredibly important to many organizations, if you’re not working with the Power Platform tools, or the available Power Automate templates, configuring them to be dynamically generated from data in your CRM can be very difficult, time-consuming, and often require a developer to make look professional.
I’ll show you exactly how easy it is to use Power Automate to send custom Word templates today. This guide is split into two main sections:
- Creating Word Templates: We will cover adding Content Controls to an existing Word document to create a template that is compatible with Microsoft Flow.
- Setting Up a Flow: Here we cover creating the flow itself. Which nodes to add, in which order, and a couple extras incase you don’t just want to send an email
Creating Word Templates
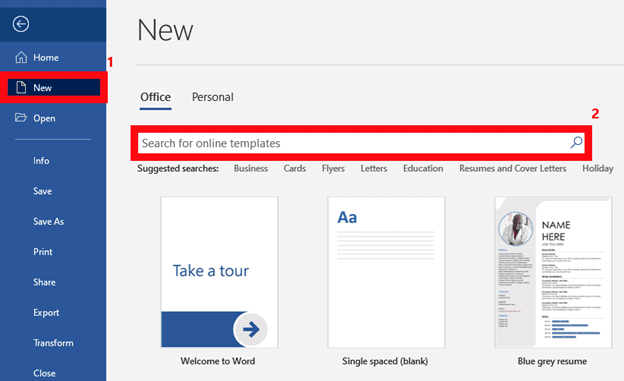
- We want to start with an existing certificate that you have formatted in Word. For the purposes of this guide, I will be using one of Microsoft’s existing Word templates. These can be found by clicking ‘New’ then searching for online templates:
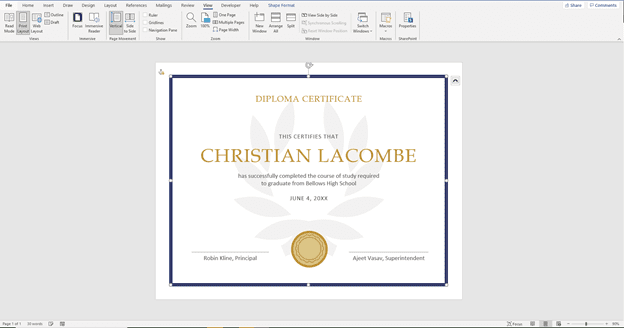
- This is the certificate I grabbed from Microsoft’s Word templates but this can work for any Word document you have.
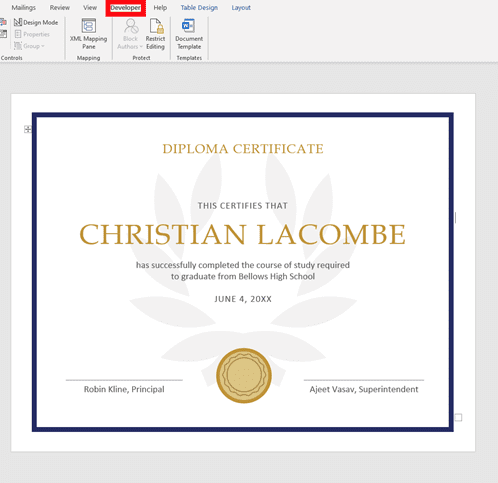
- With a document selected, we now need to open our Word developer tab. If you do not see a developer tab in the top-most toolbar, please refer to this guide by Microsoft on how to add it.
- Now that you have it, Click to open the Developer tab:
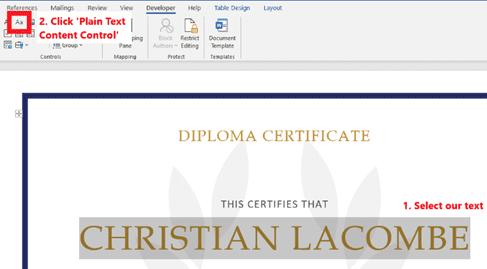
- In, the developer tab, we want to clean-up and add plain text content controls to where dynamic text should appear on our certificate ie: First and Last Name, Date, Award Title, etc.
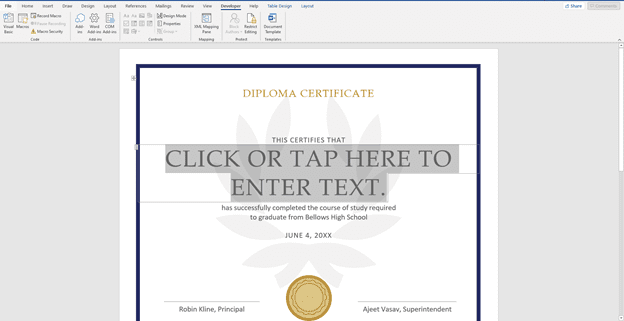
- To create content controls, we want to select a part of text then click the plain text content control button:
- Once you click the content control button, your text will be replaced with ‘CLICK OR TAP HERE TO ENTER TEXT’:
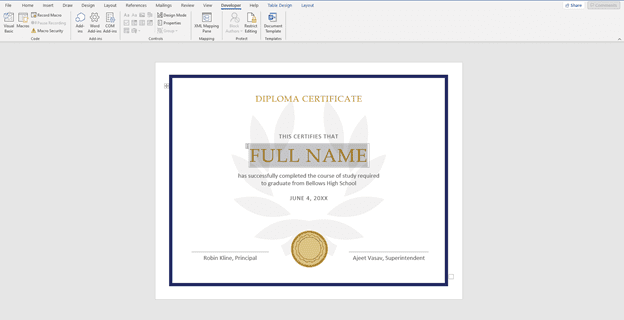
- It is best to replace the standard text with a descriptor. Here I chose ‘Full Name’:
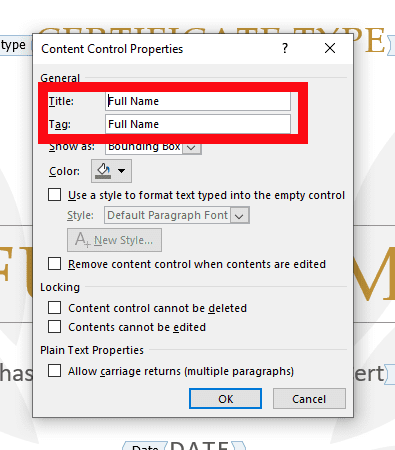
- Now that we have our content control text, we want to update the tags. This can be done by enabling ‘Design Mode’, Selecting our text, then clicking properties (NOTE: in order to add more content controls, you will need to exit Design Mode by clicking the Option again)
- This will open a window where we are able to enter our title and tag. For both these fields, input the same descriptor as we wrote in previously:
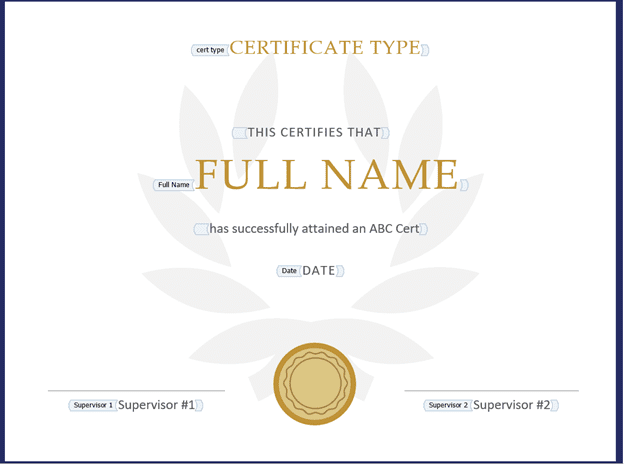
- Repeat steps the steps of selecting a piece of text, turning it into a content control, then updating the title and tag for each field you would like to configure for dynamic values and you will end up with something like this. Each tagged line below will be a dynamic field:
- You will want to upload it to somewhere that is accessible while creating your Microsoft flow. I chose to save this in my user’s one drive account but it can also be saved in Sharepoint or any other platform that Power Automate can pull from.
Setting up a Power Automate Flow for Your Word Template
Now that we have a Word template to work with, we can move on to creating our flow and sending the certificate.
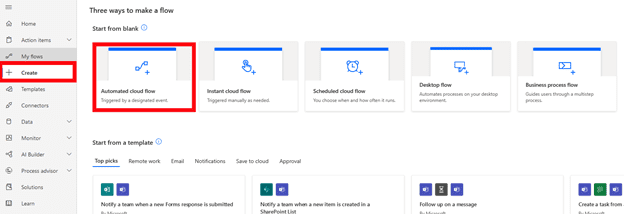
- First we need to Create a new flow. We can do this by going to Power Automate, selecting ‘Create’:
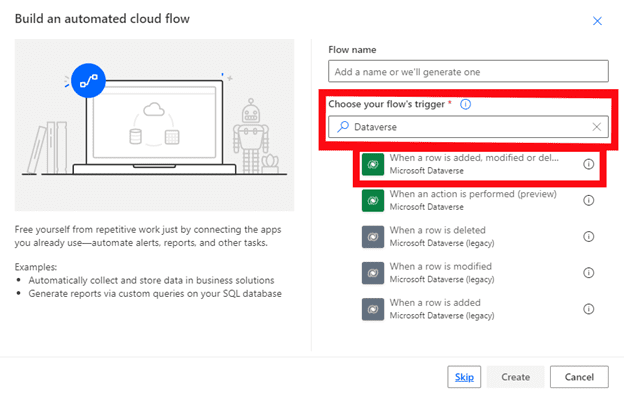
- In this scenario, I am going to use a Data Verse trigger to start our process:
- Adding the When a row is added, modified, or deleted node flow to start out. I have populated this with an Initial Certification Application record from the Cobalt solution:
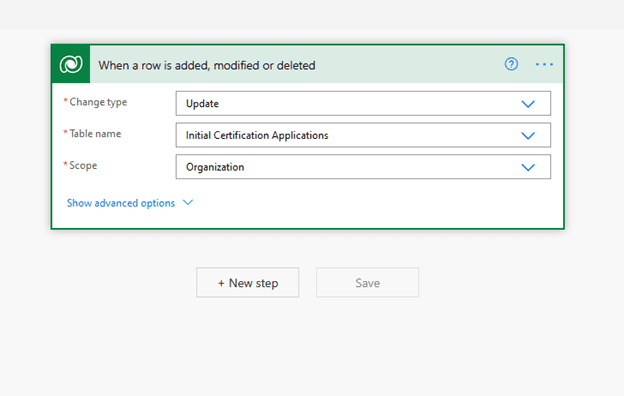
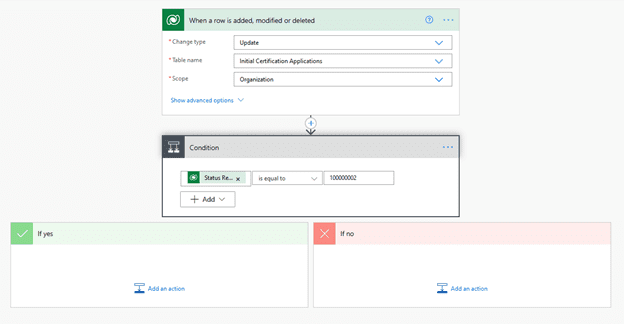
- The data verse trigger will run whenever a client has their Contact record updated. We will also include a filter here to check the status of the record. This condition is checking for a specific status reason on the record that is updated:
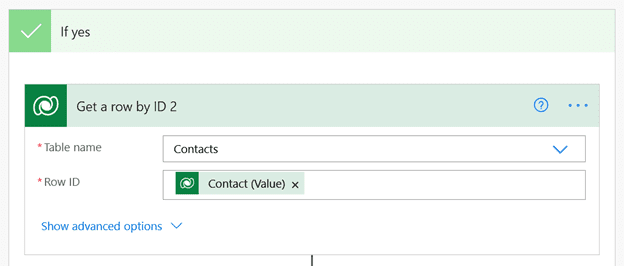
- The trigger and status check have been set, now we need to use data verse nodes to ‘Get’ records related to the record this flow is looking at. We do this using the Dataverse Get a Row by ID function. Below demonstrates pulling the related Contact for our Full Name value:
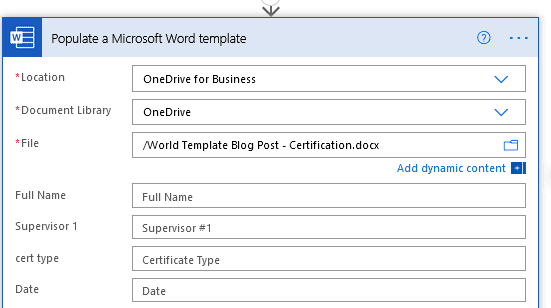
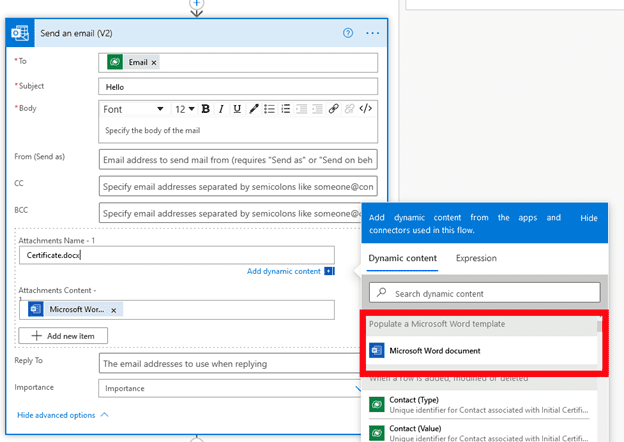
- Once this is complete, we need to pull our Word document and populate it. You will need to search for the Word Populate a Microsoft Word Template function. Each field will use the previous Dataverse ‘Get’ nodes and you will see each dynamic content control here:
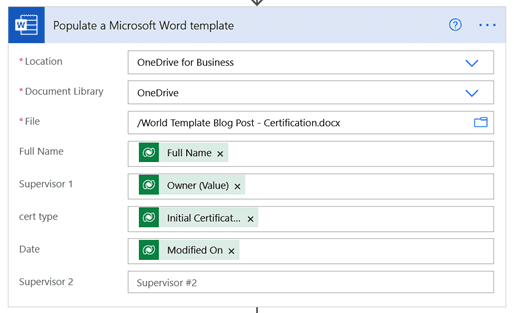
- For each of the dynamic fields you will in want to search for the value pulled from theGet Row ID Nodes:
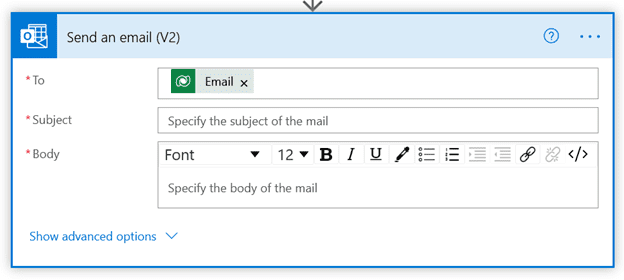
- The final node that we need to add is the Outlook Send an Email (V2) function and add our document as an attachment. Here we are sending the certification to our contact:
- We also need to open advanced options to include the generated Word document as an attachment:
- This is a look at the completed workflow:
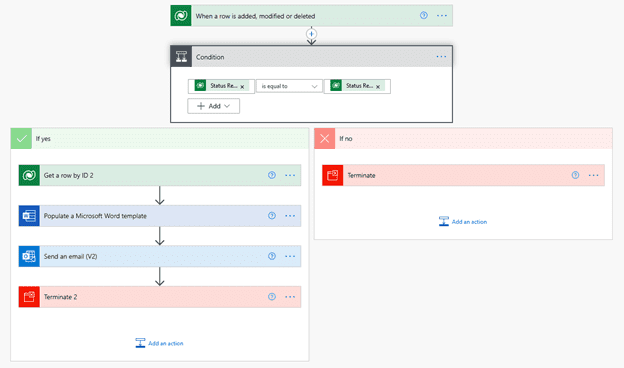
- Once this has been turned on, when our Initial Certificate Application records are updated to the proper status, an email will be sent to our certificate recipient all of which are pulling from a record in Microsoft Dynamics
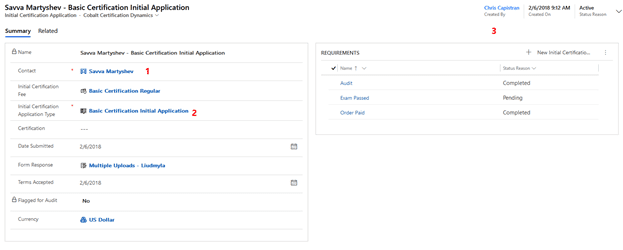
- The Initial Certificate Application Record (not show, date modified):
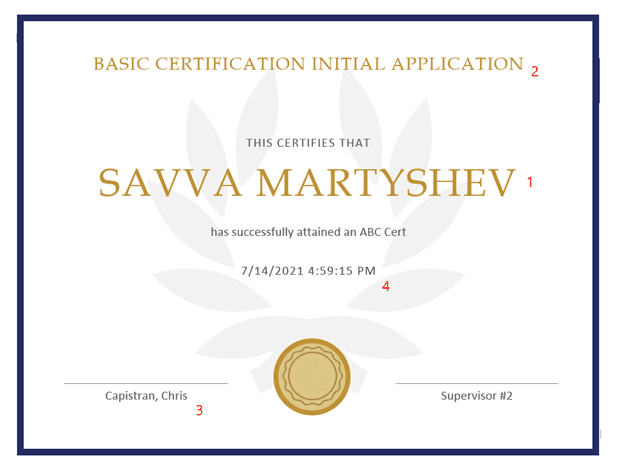
- The generated certificate (Date modified ‘4’):
Conclusion
The Power Platform is certainly the future of automating processes in Microsoft Dynamics 365. Getting to know the different tools, including their library of Power Automate templates, that Microsoft offers can expand what you can do with your system. These new tools also offer automation possibilities that weren’t available before. Let’s talk about specific ways your organization can get the most out of Dynamics 365 and Power Automate.

Connect with a Power Platform Expert
Fewer manual tasks. Powerful business insights. Microsoft license optimizations. Targeted training for your team to use these tools the ways we do every day. Let’s take 15-30 minutes to explore what Cobalt and The Power Platform would do for your team.