Managing your member lifecycles is incredibly useful and easy with Microsoft PowerApps Business Process Flows.
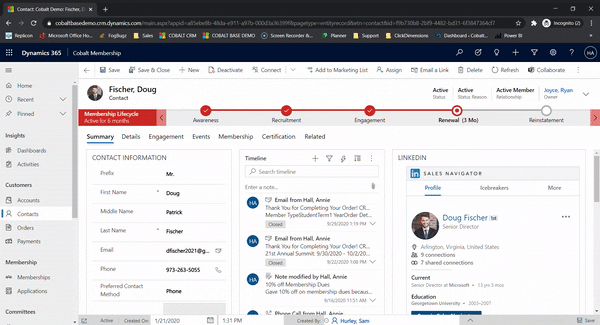
In our recent webinar, Staying Relevant During Difficult Times: Engaging At-Risk Members, we had the chance to show associations how to combine certain data points in your AMS to identify at-risk members. One of the data points we used was the member’s current place in the membership lifecycle.
We created our membership lifecycle using a Business Process Flow (BPF). Powerapps Business Process Flows are completely out of the box with Microsoft Dynamics 365 and typically have three main functions:
- Streamlining a business process
- Automating the arduous tasks associated with that process
- Providing a quick visual representation of where someone or something is in your process
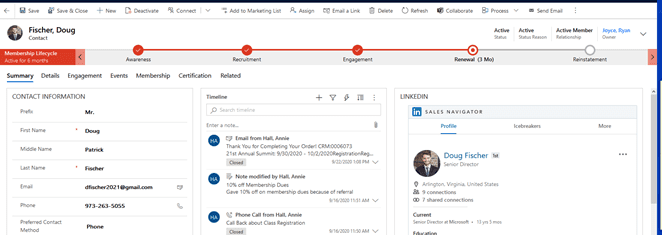
The benefits of our membership lifecycle BPF are two-fold: staff can always see what needs to happen next for that contact and each member receives the same high level of service.
Now, let’s walk through how we actually built this.
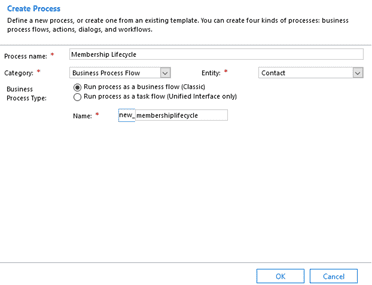
When creating your BPF, make sure to select the entity where you want this flow to appear. We want this to display on the contact record, so we choose the contact entity:
Once you create the process, you will be presented with a screen like this:
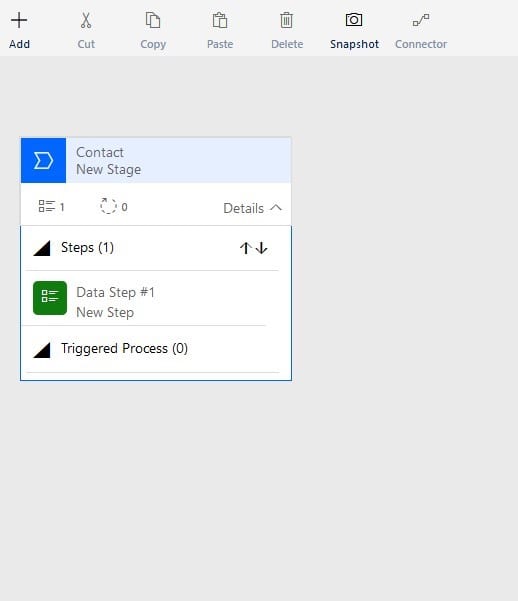
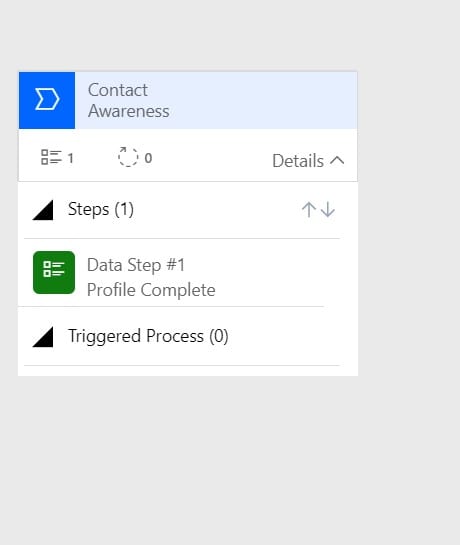
The shell of your first stage in the process is already created for you. You can rename this stage as your association sees fit. We named our first stage “Awareness.”
From there, you can start adding data steps. The first data step we want to include is verifying the contact has created a profile.
Once you have finished adding the steps you want to include in this particular stage, you can create the next stage. The contact will automatically move to this next stage once the requirements for the first stage are satisfied.
We have named our second stage “Recruitment.” Once a contact is in this stage, we want to be actively recruiting the person for membership. Our recruitment stage involves inviting the contact to attend a chapter meeting, along with a couple of other engagement strategies. You can see how we’ve started to fill out this stage below:
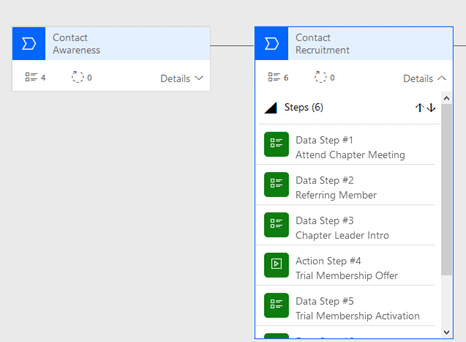
If you take a closer look at the steps in the above stage, you will notice one of these steps is not like the rest.
The fourth step is in this stage is an action step. Instead of verifying data is complete, this step presents itself as a button that kicks off an automation. When a staff member clicks this button, a trial membership offer is automatically sent to the contact.
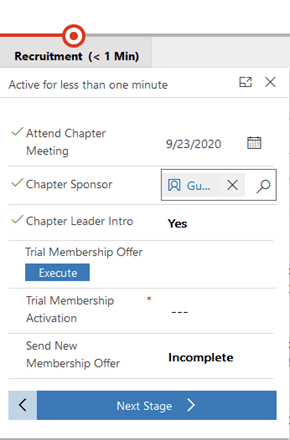
As you start to fill out your process with different stages, each with its own set of data and action steps, it will start to look more and more like our completed membership lifecycle.

Once you are satisfied with your BPF, all you need to do is click ‘Activate’ and your beautiful new BPF is ready to go!
The Power Apps Business Process Flow we described here is one we have configured for the membership lifecycle, but you can use BPFs for virtually any process. Another way we love to use the BPF functionality is to track event setup and preparation tasks.