In my time working as a Microsoft Dynamics CRM consultant, one of the things I’ve found myself doing most often is backing up and redeploying various organizations. After the work is done choosing a new AMS or CRM, associations often need help backing up and redeploying. Documentation on this is easy to find for CRM online, but not as plentiful for on premise organizations.
Why we do it
The main question is, why would you need to back up and redeploy a database? Wouldn’t you just want to back up and store a copy for disaster recovery purposes?
At Cobalt, we use a three-tier testing structure consisting of a development, stage, and user acceptance testing environment. When we’re working with a new client, we’ll often get data set up on stage, and then redeploy that database up to UAT (user acceptance testing server), that way we have all of the same data at the fraction of the time.
The most common use though is when we start a new project with an existing customer. When we go to upgrade an association, certification, accreditation, or small business client to the latest version of Cobalt’s Engagement Dynamics, we want to make sure that we get a scenario that’s as close to the actual production rollout as possible. How do we do that? Well, simply redeploy a copy of production for the UAT. This lets us troubleshoot and essentially practice the upgrade in a real-world scenario.

Need Dynamics CRM or D365 Hosting?
Cobalt has 3 different hosting packages and 15+ years of hosting and Dynamics expertise.
That’s all great, but how do I do it?
If you can navigate SQL Server Management Studio and Deployment Manager, it’s really, really simple.
Back that Database Up
- On the server that is running SQL Server Management Studio, fire up SQL Server Management Studio
- Log in with a user that has access to the MSCRM_CONFIG and related databases
- Expand the databases
- Right click and select Tasks -> Backup
- On the screen that appears, verify that the selected database is correct
- Under destination, it will default to the default backup folder set during the install of SQL
- If this is where you want to store the naming convention you want, leave this field alone. Our best practice though is to include the date you took the backup in the name, in YYYYMMDD format.
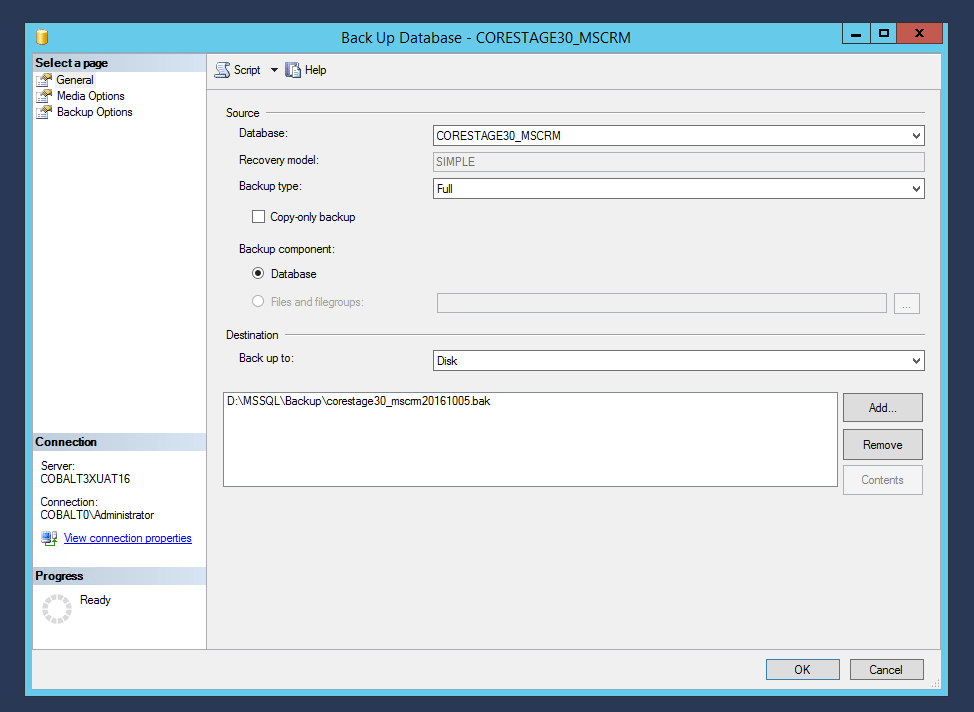
- You shouldn’t need to update anything under the media tab
- Under the backup options tab, you have the ability to set whether or not you want to compress the database. For the most part, Microsoft Dynamics CRM databases are relatively small, but the size of your database and the space on your server should really determine whether or not you compress. For more information on compressing databases in SQL Server: https://msdn.microsoft.com/en-us/library/bb964719.aspx
- You’re good to go! Hit okay and wait for the backup to complete
Restore Database Backup
- There are multiple ways to move your database backup, the easiest of which is to map network drives and move the backup from one Virtual Machine to another
- Our best practice is to drop the backup in the SQL Backup folder
- Once you have the backup of your database on your target server, fire up SQL Server Management Studio
- Right click on databases and select restore database
- Toggle the source to device and hit the ellipses
- This will prompt you to select your backup device
- The location will default to the Backup location specified during SQL setup. If this isn’t where you stashed your backup, navigate to where you stored it and select it
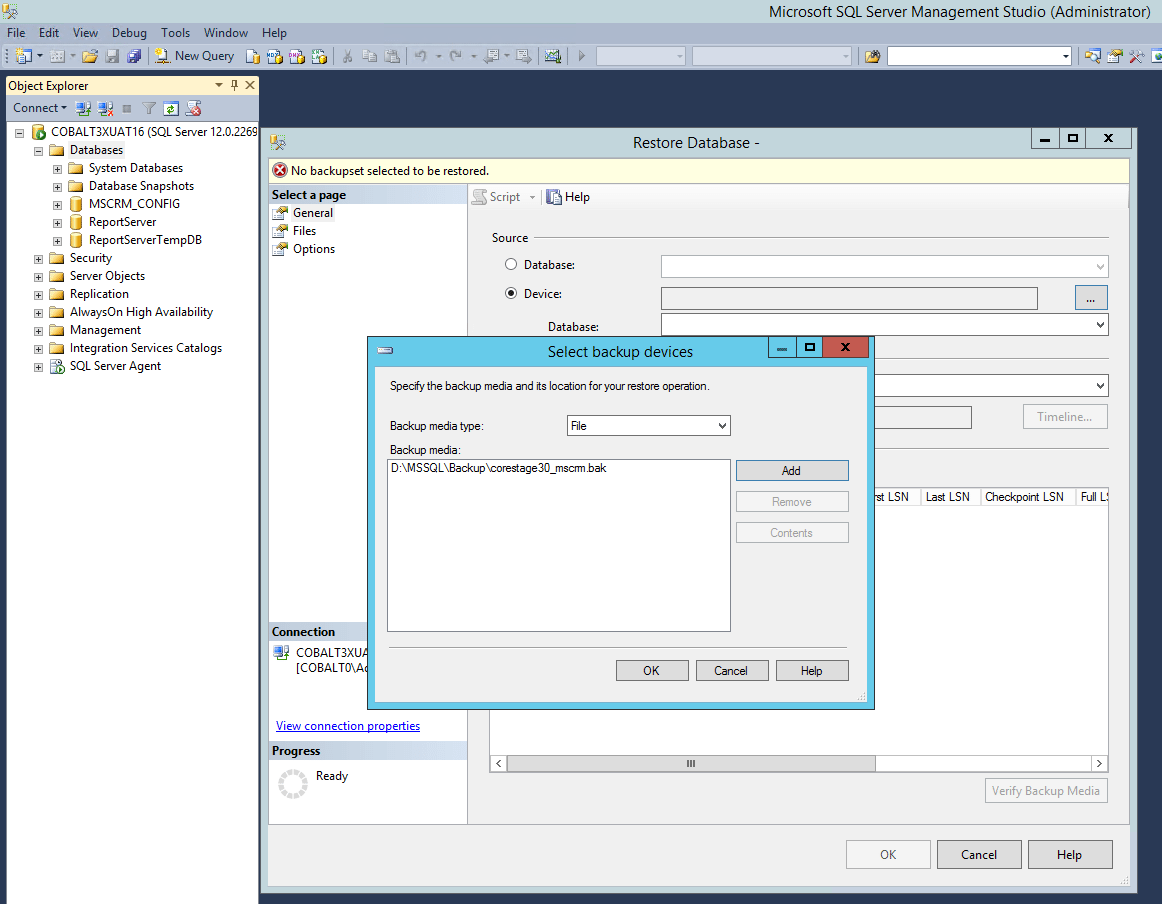
- Hit okay, and the UI will spin up the relevant information
- Under destination, database: update the database name to use the new name on the new server
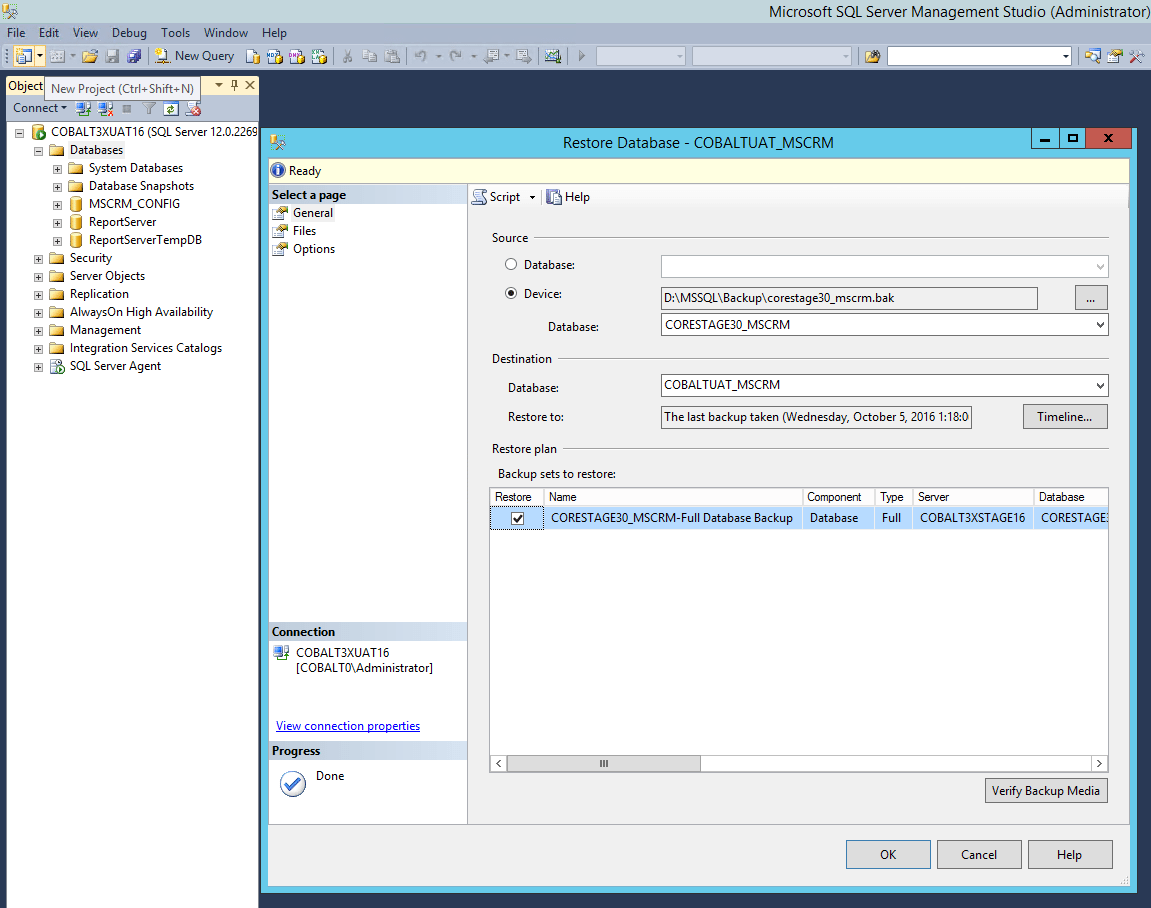
- Under the files tab, you can update where the Rows and Log are stored, our best practice is to leave these in the Data directory
- Verify that the database name in these two files updated when you changed the database name in step 9
- You’re good to go! Hit okay and wait for the restore to complete
Reimport your Org
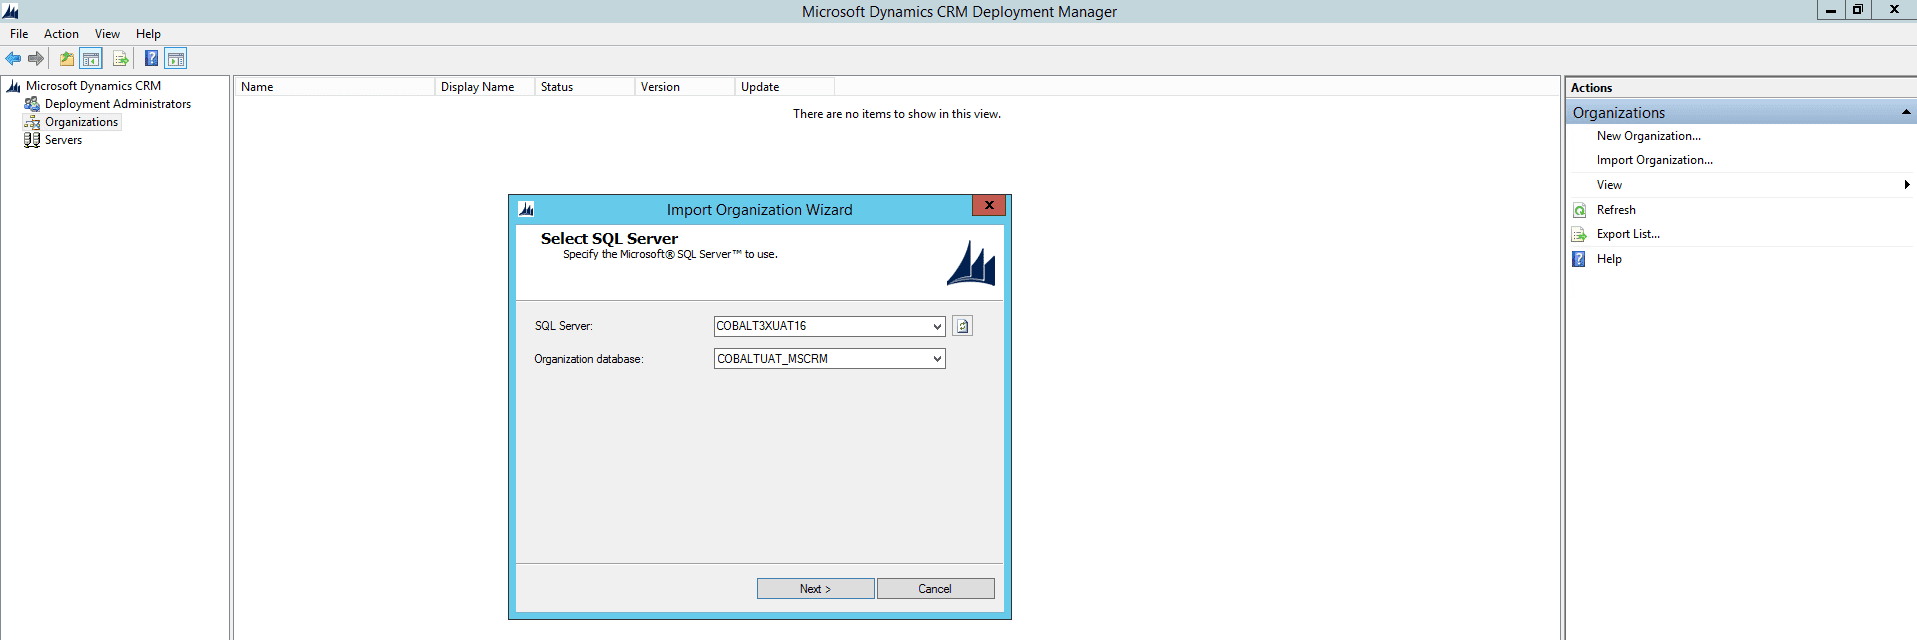
- Fire up deployment manager
- Select Organizations, and on the right hand side select Import Organization
- Under organizational database, your freshly restored database should appear, hit continue
- Update the display name for your org, the unique database name will automatically update
- You can then select to automatically map users, or use a custom mapping, this is really personal preference
- You’ll then be prompted to map your users, or you’ll pass the user checks, depending on what you select previously
- Hit continue, and deployment manager will kick off the System Check
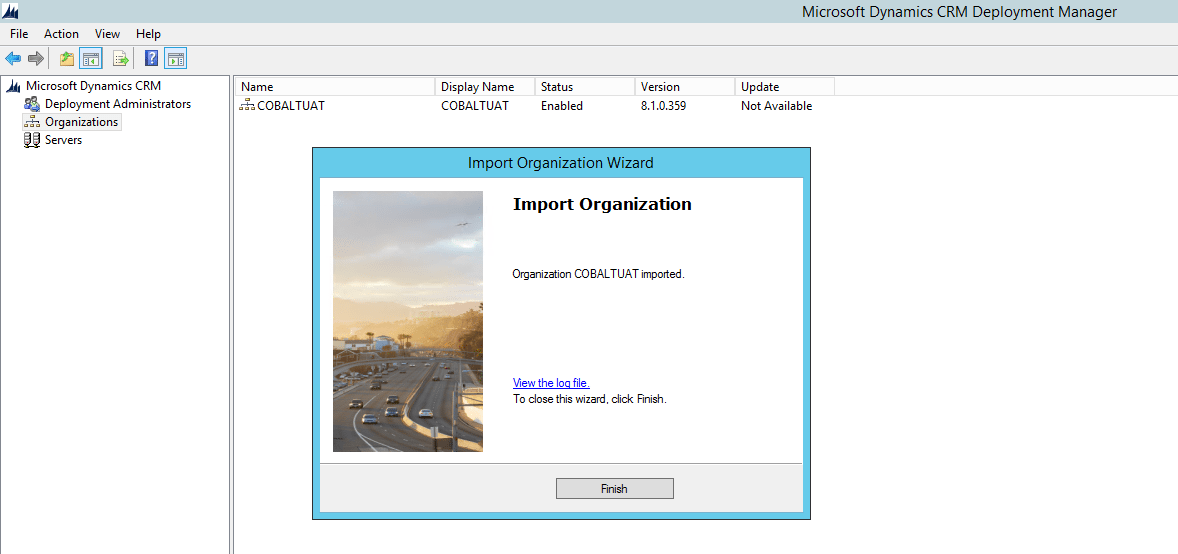
- Once that is complete, hit continue, verify the information is correct, and then hit import
- Wait for the import to complete, and once it’s finished, you’re all done!
More CRM Resources for Your Team
Put Cobalt’s expertise to work for your team. We’ve completed hundreds of successful, secure CRM migrations for organizations like yours in the last two years. If you’re considering a CRM migration at some point in the future, here are some resources that could make this project easier.