We love Power View, Power Query, and Power BI here at Cobalt. In fact, we’re addicted to Excel. It’s one of the skills I have learned in business school that I still use on an almost daily basis for our Engagement Dynamics customers. You can imagine how excited we were when the support for OData feeds from CRM Online were made available in Excel. After testing this out in our own CRM Online instance for many of our internal reports, we decided it was time to take this to our customers. Of course, we had customers running CRM 4, 2011, and 2013 (2015 was yet to be released) and we had a mix of On-Premise, IFD (Internet Facing Deployment), and Online. The first customer we attempted to set this up for was running CRM 2013 using IFD and we got the following error:
DataFormat.Error: OData: The given URL neither points to an OData service or a feed:
What? How is this URL any different that the organization service URL for CRM Online? The answer is that it’s not the URL, it’s the authentication type. The feed will only work if your using CRM Online authentication so Windows authentication (On-Premise) or claims authentication (IFD) won’t work. My first thought was, that sucks, but we weren’t ready to give up that easily. We remembered that you can create a connection to CRM using Excel for On-Premise or IFD is you have the CRM for Outlook client installed, so we did the following to enable Power View and Power Query with IFD. I hope this is helpful to others struggling with this roadblock.
Learn How Cobalt Can Help You with CRM
Step 1: CRM for Outlook Client
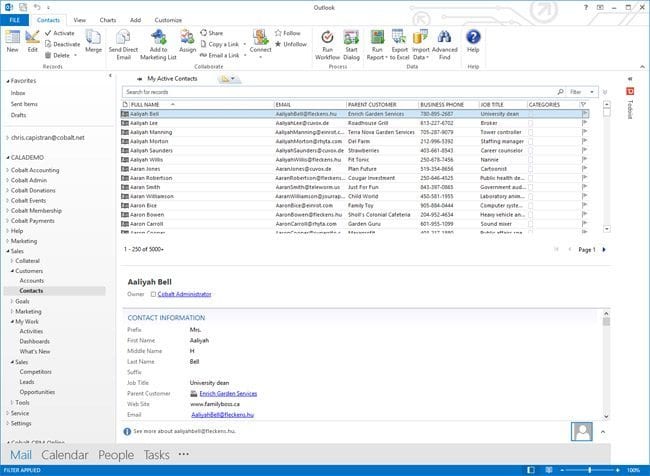
The first step is that you have to have the CRM for Outlook Client installed. I’m not going to go through that here since Microsoft’s got us covered for this one. Once you have this setup, navigate to any entity and select a view (e.g. My Active Contacts). Note that the entity/view are really important since we’re just using this to create the connection between CRM and Excel.
Step 2: Export to Excel
From the view, simply click the Export to Excel button and select Dynamic worksheet.
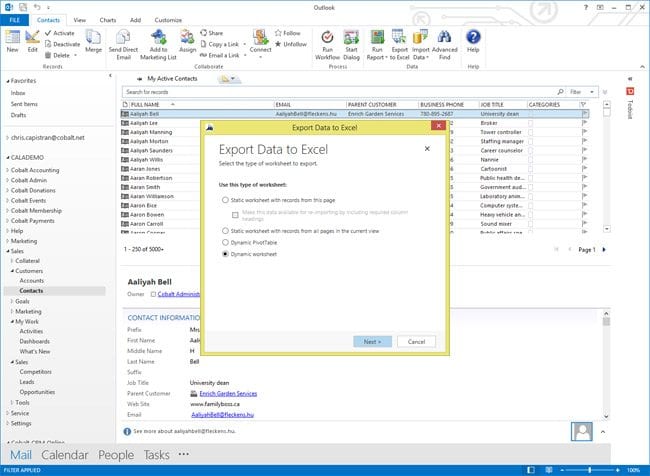
You’ll be asked to edit the columns being exported, but again, this is not important so you simply click Export and then open the file in Excel. When you open the file, you’ll need to first click Enable Editing and then Enable Content.


You’ll be presented with a message prompting you to refresh the CRM connection. The message will vary depending on the version of CRM, but in CRM 2015 it’s:
To view and refresh dynamic data, Microsoft Dynamics CRM for Outlook must be installed. If it is already installed and configured, click “Refresh from CRM” to sign in to Microsoft Dynamics CRM. If you do not want to be prompted again to sign in, click “Save my email address and password” on the Sign In page.
You then simply click the Refresh from CRM button under DATA and you should see the data from your view.
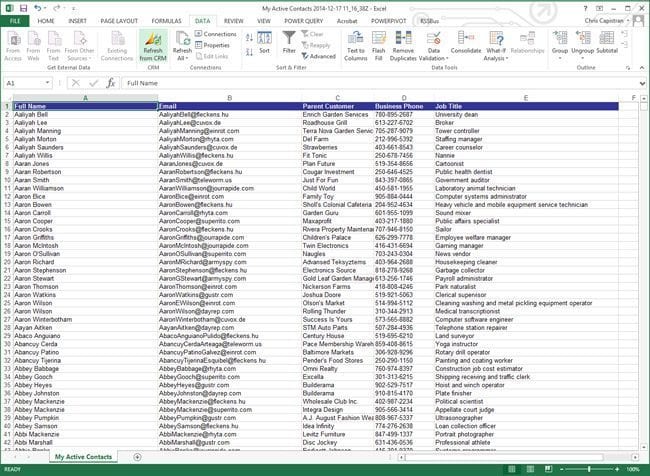
Now you can save the Excel file locally as an Excel Workbook and our setup is complete.

Note that now that you have this connection setup, you can start from here when making subsequent connections.
Step 3: Create the OData Connection
Now you should be able to create a connection. You’ll notice that there are 2 paths for this in Excel. To create a connection to CRM Online, you would use POWER QUERY > From Other Sources > From OData Feed. For the connection we’ve established, you’ll need to go to DATA > From Other Sources > From OData Data Feed.
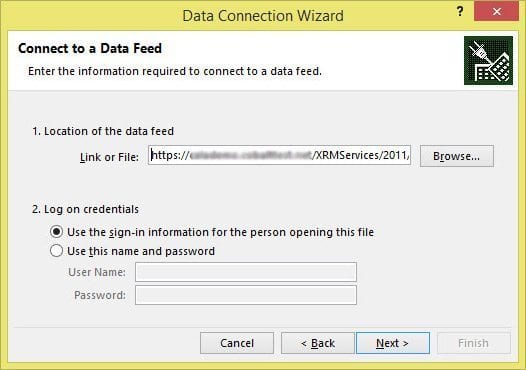
For the Link or File field, paste the Organization Data Service URL. Since your CRM credentials are now embedded in the Workbook, you should select “Use the sign-in information for the person opening this file” and click Next. You can find the URL by going to Settings > Customizations > Developer Resources in CRM

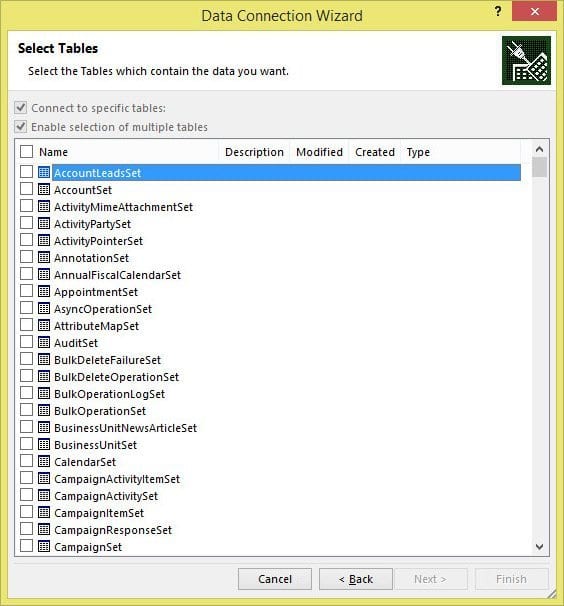
Step 4: Select Your Tables
You are now able to select any table you’d like in CRM (assuming you have read permissions) to start building your Power View reports.
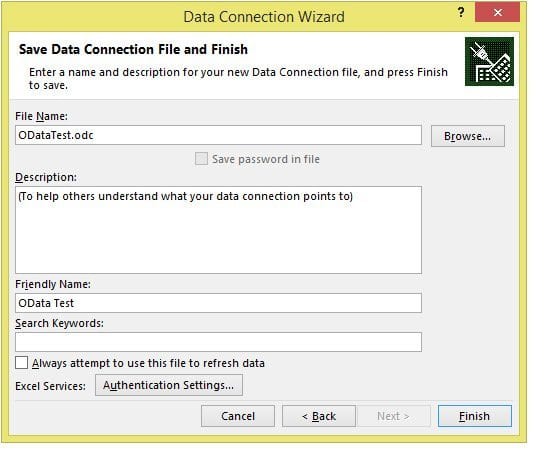
You’ll be prompted to save your connect and click Finish.
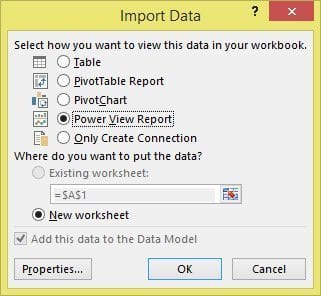
You can then select how you’d like to use the new connection. For this example, I chose Power View Report and clicked OK.
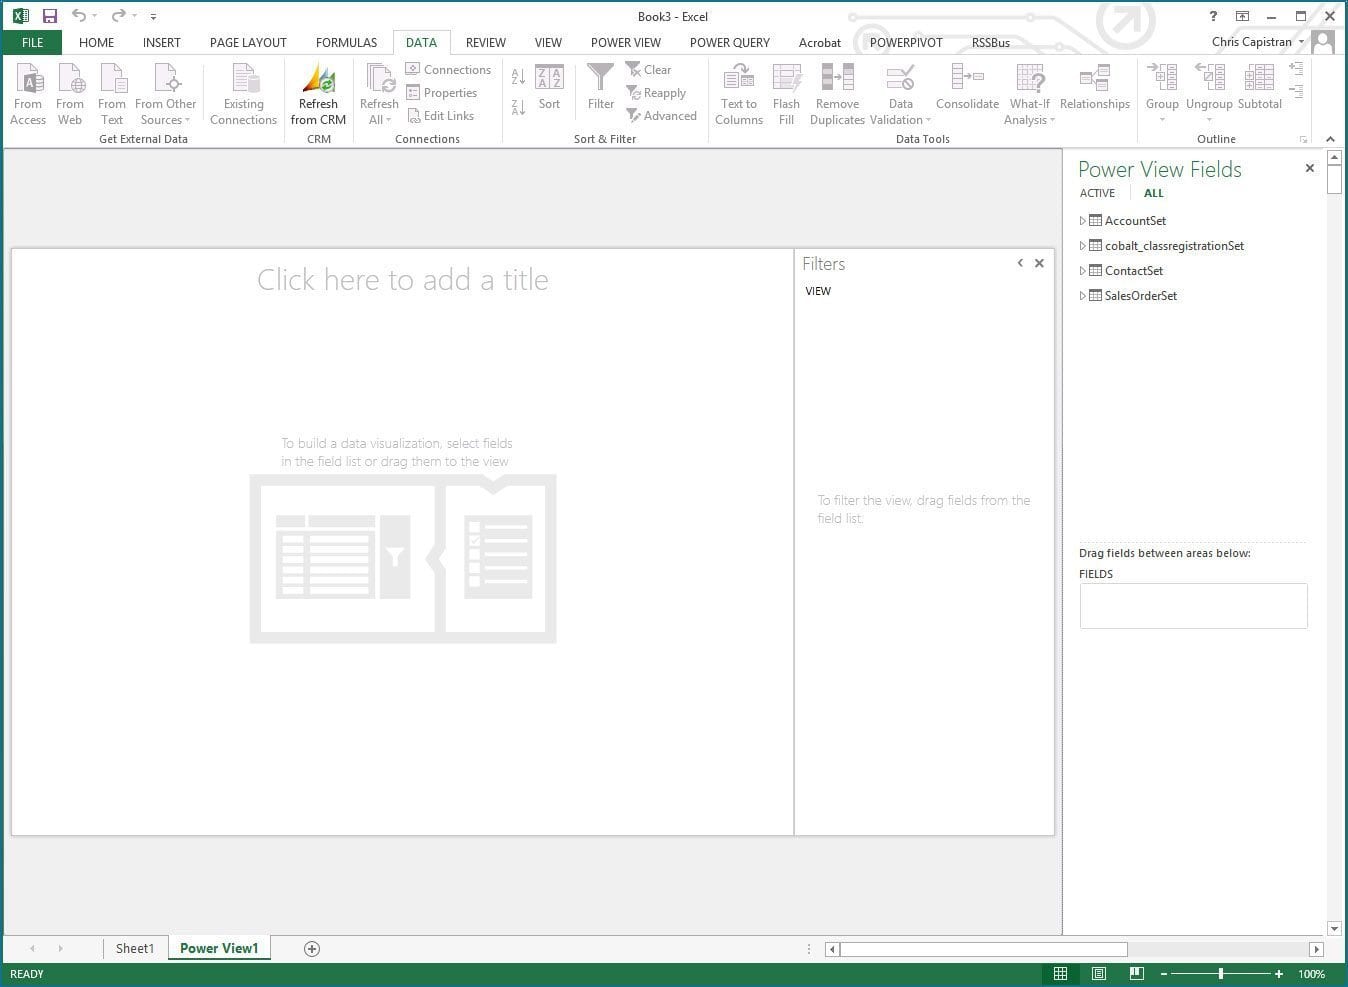
Step 5: Start Using Power View with Your New OData Feed
You now have everything you need to create Power View reports from your On-Premise or IFD instance.
Conclusion
While not ideal, this does allow you to better use the power of Excel with Dynamics CRM On-Premise or IFD. The best experience is still Office 365, CRM Online, and Power BI but we are hopeful that support for the direct feeds will be expanded soon.